|
|
|
|
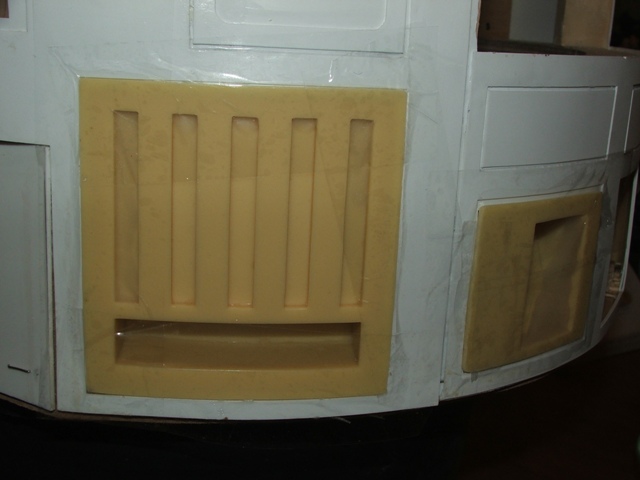
25th October 2009 I've not been doing much to Artoo lately, and I've been pondering whether to glue the resin details to the skins before or after paint. The resin coin returns and vents I got from Don Jarr's eBay shop were all curved, but didn't match the curve of the body, so I dropped each in some boiling water until they went soft and then dried and taped them to the body so they re-shaped to match the curve. Once these had cooled, I decided to glue them in place now - reasoning being that if I wait until it is painted I'll end up making a mess with the glue and would have to repaint some areas. I've used Araldite resin glue to fix them in place, with some clear silicon sealant behind to hold them nice and tight - the coin returns were hardly bigger than the holes in the A&A skins, so not much overlap but hopefully when its all dry they will hold in place. The Octagonal ports and power couplings will be fixed in place after they are painted as they both fit from behind and have more detail that will need some hand painting before fitting. |
|
|
|
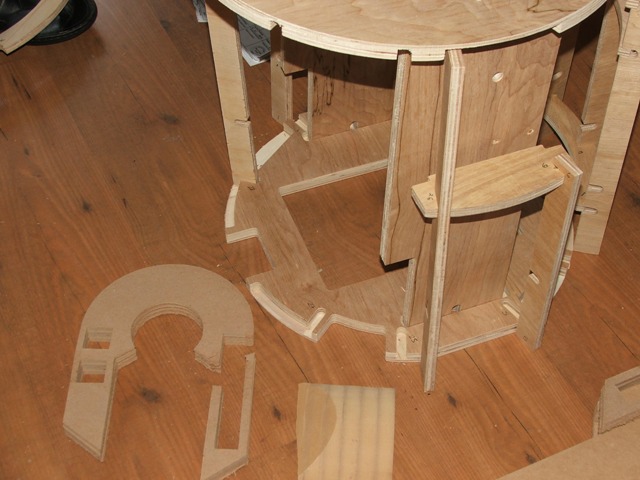
27th September 2009 I made a start on the door for the back of the frame last week and whilst its no where near finished, a few progress shots. Its a bit rough round the edges and needs the outer skin on - and some mounting brackets. I'm toying with having some metal L brackets mounted to the frame, with four M4 bolts, on one each corner of the door - reinforced inside - so it can be bolted in place with the dome off. I have also re-done the base plate of the body with some 6mm MDF due to the styrene sheeting distorting due to the cement I used... |
|
|
|
14th September 2009 It's all go now to get the body ready for paint - the only bits I needed to get done were mounting the skirt, and checking that the octagonal ports, power couplers, coin returns, coin slots and pocket vents all fitted - and to my surprise they didn't. First things first though, I marked where the resin skirt would sit on the base and then drilled 8x 6mm holes through the frame. I then carefully marked where the holes would need to be on the four sections of the skirt and drilled corresponding 12mm holes in the skirt panels. With the bolts in the frame, and the skirt resting on the floor, I filled the holes in the skirt with epoxy resin and lowered the frame onto the skirt, left it for an hour and the bolts are now stuck fast. I won't glue the skirt to the frame, but bolt it on, and once its all painted I'll use a fine bead of filler around the edges so it looks like it is all one piece. I also re-bolted the centre leg in, but this time with some captive Tee-Bolts instead of the wing nuts to make it a bit neater underneath. |
|
|
| The resin power couplers both needed sanding so they would fit, and the recesses in the frame all needed some chiselling to get the parts to sit flush to the skins. Both the pocket & side vents and the coin returns will need to be softened in hot water so I can increase the curve to mirror the frame before painting. |
|
|
|
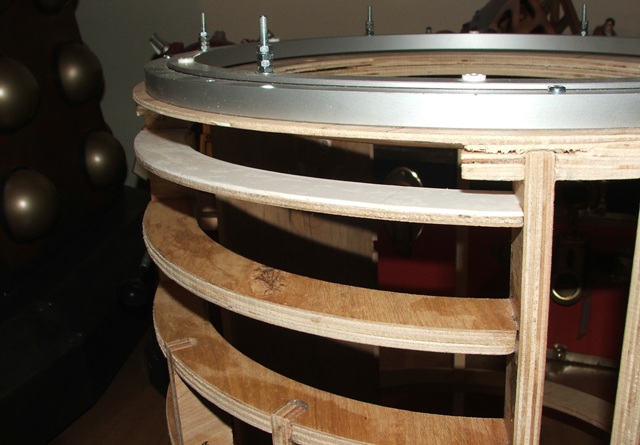
13th September 2009 I was really pleased to see that the glue had kept it's 'stick' over night and that the front skins weren't hanging off, but it looks like a success as it's all stuck. Today I started by sticking the rear skin outer layer in place, then the panel details to the front, and finally the details to the rear with a light sand to remove any residue. A few panels are slightly out of line, but Artoo is meant to be a bit beaten up so its all looking good. I've cut a disc of 2mm styrene and glued this to the base over the wood so I've got a nice smooth surface to paint - I've cut the hole for the centre leg out - no picture though as I cut my finger when a blade snapped (ouch!). The leg /shoulder holes needed a slight sand so the 170mm diameter aluminium tube which fit over the leg hubs, will slide into the skins. The final job today was to cut a ring of MDF for the inside of the dome with holes that line up with the Rockler - which is now screwed, glued and drying. |
|
|
|
12th September 2009 I've made a start on the outer skins. Using the coin slots as a guide I taped the skins in place and slowly made my way from side to side using liquid solvent cement from EMA Models. I tried super glue, hard plastic glue, glue with nail polish remover to aid stickiness, and none worked, but the liquid solvent melts the surface in a few seconds and after its been taped for a while seems to have worked. Any residue is easily sanded clean. The front is glued and the section below the rear door is in place, just leaving the main rear section and the small door details. I need to make the door for the rear, and I'll do the door skin when its made... |
|
|
|
11th September 2009 Earlier in the week, after forgetting to drill holes during the assembly of the frame, I drilled some slots for the bolts that will hold, and allow rotation, of Artoo's arms. They're not very tidy due to not having good access for the drill, but the arms can now be bolted in place and will open & close. I've also stapled the first layer of skins onto the frame - the front layer is fully stapled ready for the second layer to be glued in place, and the rear is only loosely stapled until I decide how large the door at the back will be. I'll cut the ear access door from the skin whilst it's in situ so it matches up with the frame struts and then build a door for the cut-out to be fixed to from some scrap wood in the garage. |
|
|
|
30th August 2009 Very small bit of work on the frame today - the section of plywood that the large data port sits on was too thin and didn't sit straight in the frame, so I've cut a piece of 2mm styrene and glued them together overnight, so it fits nice and tight. |
|
|
|
14th August 2009 Quick note, a second hand set of styrene A&A Skins arrived today, I've checked them and they are complete, and repacked up for now... |
|
|
|
28th June 2009 The frame finally arrived, after a month of it being moved around the US, it finally took off from San Francisco on the 22nd June, and was delivered to me yesterday. Its pretty much as it was advertised but with a bit missing, and not really great quality - and if I'm honest not worth the $100 I paid of it. Anyway, after a mild disappointment, I sanded down all the joints this morning and glued it together this afternoon - only section not glued on yet is the top - purposely until I'm happy with the rest. Pictures below show the broken leg horse-shoe and a missing strut at the rear. I'll fix the horse-shoe and I already cut a section of wood to replace the missing strut. The second picture shows the kit in all its bits, minus the strut, and the bottom pictures are the frame assembled without glue, then the final picture is it glued and drying... |
|
|
| 21st June 2009 In the absence of a frame, which is somewhere either over or on the Atlantic, and to test how good the styrene sheeting I have used for the feet is with different glues, I decided to make up the 'coin returns' for Artoo's body. There are three in total, one lower front left, and two smaller ones at the bottom of the rear panel. Using some 1mm styrene, I cut out the plates (OK, I cut the holes out slightly too large on the rear ones) and then cut up some strips to make up the indent on the back. Full plans are available at www.astromech.net. I used SuperGlue to make the initial bond, but it can be quite brittle, I then smothered the rear side with Araldite two part glue, which forms a resin and is very strong - I used a lot of it when building the Daleks. They are now sitting upstairs drying, and I'll try to be patient and leave them for a few days to harden before sanding the rear sides to tidy them up. |
|
|
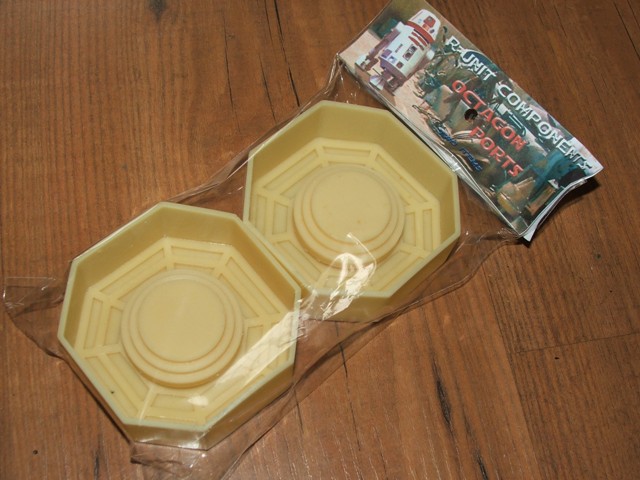
| Below are some of the resin parts I've picked up off eBay in the past few months, from left to right the main vents, power couplings, coin slot, restraining bolt, pocket vents and octagonal ports. These will be kept out of the way until the frame is up and skinned. |
|
|
.JPG)
.JPG)
.JPG)
.JPG)
.JPG)
.JPG)
.JPG)
.JPG)
.JPG)
.JPG)


.JPG)
.JPG)
.JPG)
.JPG)
.JPG)
.JPG)
.JPG)
.JPG)
.JPG)
.JPG)
.JPG)
.JPG)
.JPG)
.JPG)
.JPG)
.JPG)
.JPG)
.JPG)
.JPG)
.JPG)
.JPG)
.JPG)
.JPG)
.JPG)
.JPG)
.JPG)
.JPG)
.JPG)
.JPG)
.JPG)
.JPG)
.JPG)
.JPG)
.JPG)
.JPG)
.JPG)
.JPG)
.JPG)
.JPG)
.JPG)
.JPG)
.JPG)
.JPG)
.JPG)
.JPG)
.JPG)
.JPG)
.JPG)
.JPG)
.JPG)
.JPG)
.JPG)
.JPG)
.JPG)
.JPG)
.JPG)
.JPG)
.JPG)
.JPG)
.JPG)
.JPG)
.JPG)
.JPG)
.JPG)
.JPG)
.JPG)
.JPG)
.JPG)
.JPG)
.JPG)