
|
|
|
|
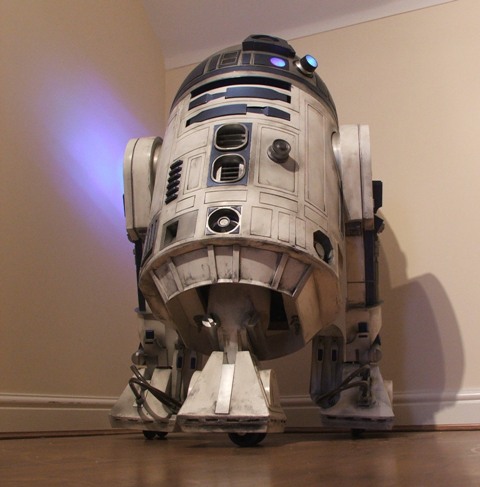
2nd April 2010 Finished. For now..... |
|
|
|
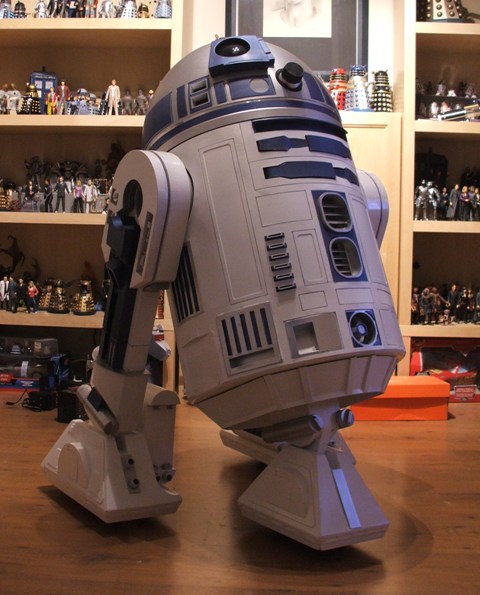
12th December 2009 Artoo is more or less finished now, apart from some weathering to make him look old and dirty - before I do though some shots of him nice and clean. |
|
|
|
6th December 2009 Not much left to do with the assembly - today I added some clips to the battery boxes that take a screw - and 8 screws later the battery boxes have their covers on. Head over to the electrics page for the RC lights and sounds I wired in today. |
|
|
|
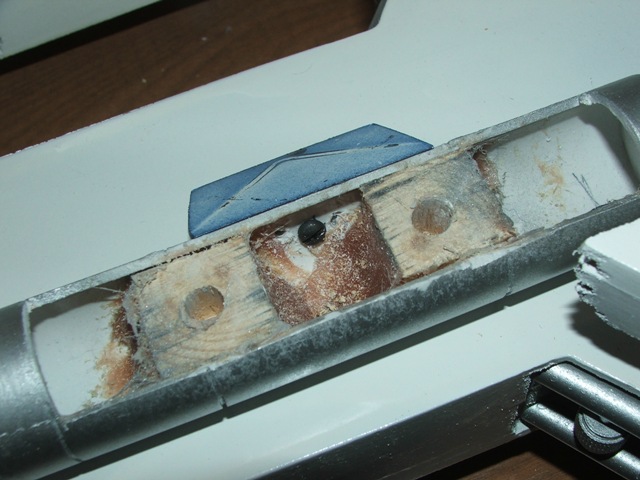
27th November 2009 As well as making the PSIs and Logics for the dome this week I have also finished the rear door (though not painted yet). The door was part of the skin set I bought a while back, so once the frame was secure I pinned and glued the skin and panel details in place. On the rear of the door are four eyelets, screwed to the frame which are used to connect some bungee cords to to hold the door in place, but allow quick access when needed. I was in two minds about using the restraining bolt I bought from Don Jarr's eBay shop, but as I had it I thought a simple way of mounting it, so I could change my mind, would be to use magnets - so I got 10 'rare earth magnets' off eBay and stuck 5 in a recess I sanded on the back of the bolt, and the other 5 lined up on the inside of the skins. The eventual weathering will show where it is when its not there but I can live with that and for the most part, when on display at home, it will be in place. |
|
|
|
17th November 2009 Just a few jobs tonight. I started by drilling some shallow 6mm holes in the ankle details, with aligned holes in the legs and some 'No More Nails# to hold them in place. Second tonight I drilled some 3mm holes in the tops of the battery box harnesses and cut some small sections of 3mm kitchen skewers to hold them to the small brackets that are glued to the battery boxes - the actual harness is not glued in place. Finally, another R2 builder pointed me to some bronze braided computer IDE cable from this eBay shop. I ordered a couple of these and tried them in the feet - they should each be 12" long, but the shorter section is just over 6" so whilst this looks OK, I've ordered another pair. |
|
|
|
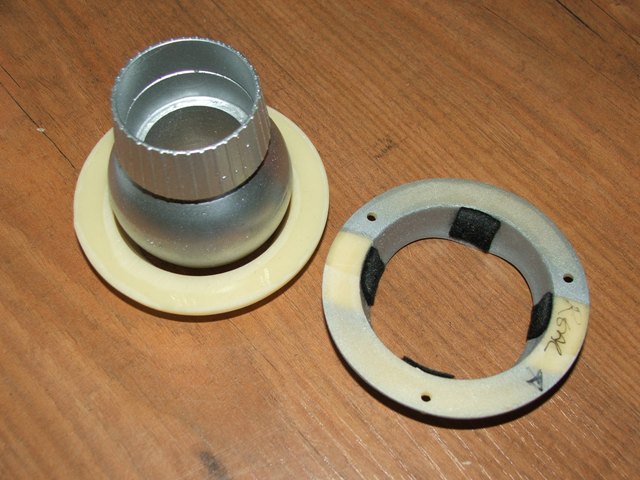
14th November 2009 Last night and today I have re-fitted the electronics - although they do need to be tidied up a lot before I can say they are finished... I've also cut the inner dome so it fits better inside the outer dome and glued them together with silicon glue - a bit of a panic was had though as I forgot to drill the mounting holes for the holos before I stuck the domes together but after a tense 15 minutes of drilling, finding bolts that were the right size and making sure the holes aligned with the holo surrounds it all went together very well. This morning I started by mounting all three holos, using three bolts per holo - the front holo got scratched on the way in so out came the black paint so I guess he is now officially a 'ANH' Artoo... Following that I've mounted the PSI reflector /tubes from www.resinparts.com using self tapping screws from the outside and screwed some beefy ankle locks to all three feet to stop the feet tipping when he is running around. The final job for today was sticking the blue panels to the dome using automotive trim double sided tape - this is the stuff used to stick number plates on cars so I think it will be strong enough to hold a few plastic panels in place - the front PSI panel has a small piece of a plastic milk bottle on the inside, between the panel and the dome, to diffuse the LEDs that will eventually be in the PSIs - I have to paint the rear PSI panel still thus why it's not there yet... |
.JPG)
.JPG) Holo-Projectors
PSIs
Beefy Ankle Locks
Dome Panels
Electronics Reinstalled
|
|
12th November 2009 Lots of smiles this evening, Artoo is back on his feet, all three of them. I've bolted the legs back together and stuck some 25mm length by 700mm diameter aluminium tube around the MDF shoulder hubs. The bolts holding gas pipe style mechanism to secure the legs at the right angle are all tightened up and the wheels are bolted into the feet. The wires for the motors run in the channels behind the booster covers, through a hole in the shoulder into the main body, and through the lower leg into the battery boxes and the Rockler is bolted to the frame to rotate the head - which is next on the to-do list. |
|
|
|
11th November 2009
(part 2) I spent this evening sticking the resin details to the skins, as well as gluing the battery harness mounts and radar eye lens in place. He's looking alot like Artoo now. |
|
|
|
11th November 2009 I did a couple of jobs this morning, some detail painting and fitting the centre vents to the frame. These are screwed and held in place by a couple of sections of L-profile aluminium, which in turn are screwed to the inside of the frame. I haven't made a back panel to blank the vents off as small speakers will be fixed to the rear of the vents later on. |
|
|
|
10th November 2009 The painting is almost finished, bar a few blue details on some of the resin parts that will be fitted to the body. Time now to build Artoo. The headshot below is the blue panels placed on the dome, not glued yet. The ankle cylinders, shoulder hydraulics & buttons, and horseshoes are fixed to the legs with dowels - each is a nice tight fit so no need to glue which is good in case a repaint is needed later on. The utility arms proved difficult to fit, and a long drill was needed to drill through the support for the large data port and through the arm supports so that long M6 bolts can be used to hold the arms in place. The top arm also bolts through the lower arm as I have no intentions of making them movable to hold it in place. The large data port has a hollow drilled out on the underside so it covers the bolt head, and it is held in place with a lot of silicon bathroom sealant. |
|
|
.JPG)
.JPG)
.JPG)
.JPG)
.JPG)
.JPG)
.JPG)
.JPG)
.JPG)
.JPG)
.JPG)
.JPG)
.JPG)
.JPG)
.JPG)
.JPG)
.JPG)
.JPG)
.JPG)
.JPG)
.JPG)
.JPG)
.JPG)
.JPG)
.JPG#)
.JPG)
.JPG)
.JPG)
.JPG)
.JPG)
.JPG)
.JPG)
.JPG)
.JPG)
.JPG)
.JPG)
.JPG#])
.JPG)
.JPG)
.JPG)
.JPG)
.JPG)
.JPG)
.JPG)
.JPG)
.JPG)
.JPG)
.JPG)
.JPG)
.JPG)
.JPG)
.JPG)
.JPG)

.JPG)
.JPG)
.JPG)
.JPG)
.JPG)

.JPG)
.JPG)
.JPG)
.JPG)
.JPG)
.JPG)
.JPG)
.JPG)
.JPG)
.JPG)
.JPG)

.JPG)
.JPG)
.JPG)
.JPG)
.JPG)
.JPG)
.JPG)
.JPG)
.JPG)
.JPG)
.JPG)