![]()
|
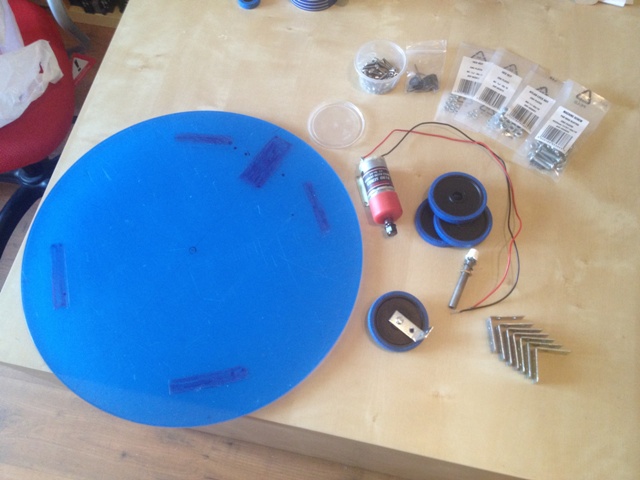
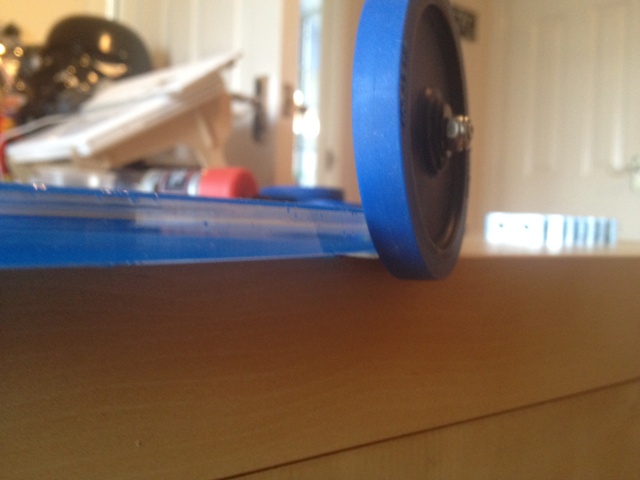
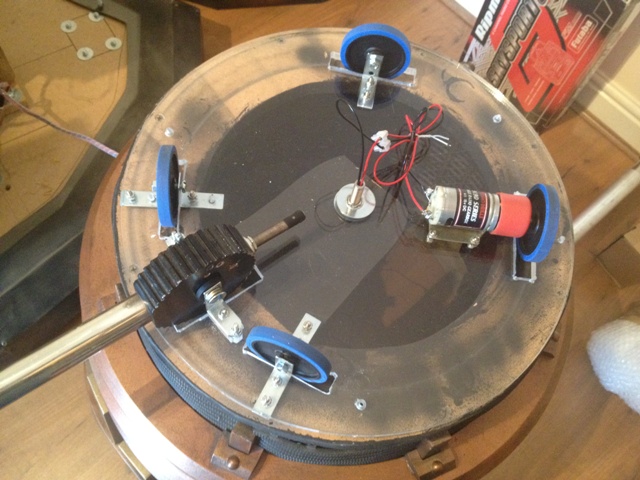
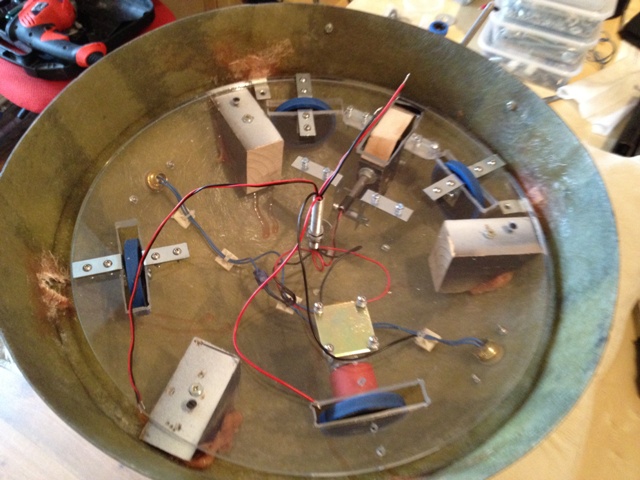
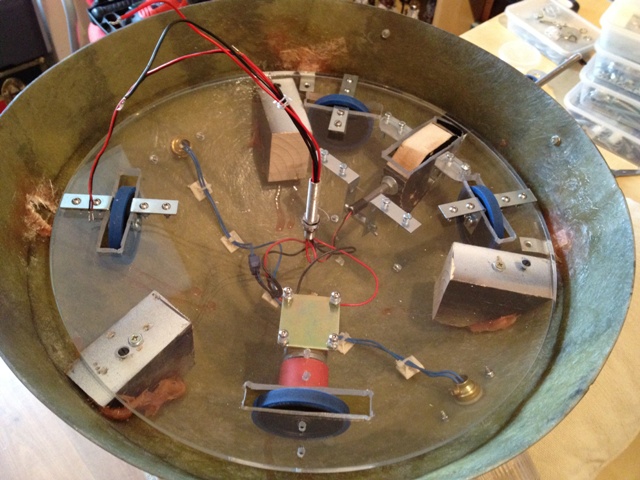
22nd September 2012 I had a good look round the Project Dalek forums for some solutions to help me with the radio control. It isn't the electronics that's the problem, after building R2D2 that's the easy bit, it's the problems I've been having with the weight of the eyeball, which was affecting not only the eye stalk movement, but also the rotation - the dome rotated, but once the head was all assembled it didn't turn smoothly and stuck. I found a pretty good build which you can see here --> http://www.youtube.com/user/rattyvulcan/videos?flow=grid&view=0. The guy has motorised his Dalek including dome rotation, eye stalk movement, and some nifty fins around the dome lights. He had a similar problem with the dome rotation and put it down to the base plate in side the head not being completely flat, and therefore the wheel hitting flat spots and not getting enough grip. He changed the MDF disc in the head to clear perspex. So to not put a finer point on it, I copied his solution. In the pics below you can see a 43cm diameter disc of 10mm perspex. 4 banebot wheels & hubs, the motor I got from Maplins in 2008(!) and some metal 'L' brackets from B&Q. I cut slots in the perspex for the wheels, two fairly close to the front to support the eye stalk, and 2 towards the rear and after carefully measuring where the wheel attached to the motor would sit, bolted up the 3 free wheels to the 'L' brackets mounted from under the disc. The second picture shows how low this puts the disc to the top of the neckbin. Once it was all assembled, including a slot at the front that the eye stalk pivot would sit in and more 'L' brackets to mount the eye to, I wired it up to a Dimension Engineering motor controller from www.technobotsonline.com and it works. I have full RC control over dome rotation, basic, but feels great that this is now a completed and working aspect of my Dalek. Below are some videos of the rotation, at various stages. You will notice in some videos the dome sticks, this was due to the wheel grub screw not being tight enough on the motor shaft, with the final video being the head fully assembled, and the grub screw firmly tightened. Next step if the full motorisation of the wheel chair motors - its rigged up with a couple of servos at the moment which is a bit rudimentary and to be honest, whilst it works its unpredictable and doesn't have enough servo travel to allow Dalek to move backwards properly - the final Youtube video shows the unpredictability quite well, that desk you can see on the left was destroyed and the shelves on the right, knocked into and moved.. So I've ordered a Dimension Engineering Sabertooth Dual 25a Controllerand a couple of Battleswitch relays to set it up properly. The Sabertooth is the same as I use to control R2, and allows control of dual motors from a single stick on the transmitter, and the Battleswitches will be used, on the same channels, to send voltage to the solenoid brakes when current is applied to the motors. They should arrive in the next week so I'll post updates once they are installed and - hopefully- working...
|
|
|
|
September 2012 Wow, almost 2 and a half years later since I updated the site, let alone this page... So, the high torque servo I talked about below didn't work. It blew with a puff of blue smoke and gave up. The weight of the eyeball is just too much when pivoted over 18" from the turntable. So I gave up again and put Dalek back together, and he sat there for over 2 years until now. I think I'll give up with the eyestalk for now, for the movement it will allow (about a 3 inch range) I don't think its worth it. But I have progressed.
|
|
9th May 2010 Back when I first started thinking about making the NSD remote control it was the eye stalk that I gave up on before putting the whole RC idea on hold. The problem was the weight of the original MDF eyeball which since has been replaced with a fibreglass eyeball. Over this weekend I mounted the eye stalk slight about 3/4cm lower than before and threaded some flexible spring (from inside one of the oil seals) through the MDF bracket to support the threaded rod that extends at the rear of the pivot. This allows the eye stalk to lie almost horizontal, but slightly down. At the top of he pivot, I've drilled a hole and bolted two metal strips - one to each side - extending back to the centre of the head. At the other end of the strips is a bolt with a spacer between. This will be fixed to a high torque servo and will allow the eye stalk to move up and down - only problem is that it still takes a lot of effort to pull strips backward to move the eye stalk but we'll see if it works when the servos arrives. The pictures below show what I've done, although its not anywhere near finished yet - the flexible spring needs tidying up and I have yet to see if will all work... Late addtional...Oh, that didn't work, the servo can manage 20kg of torque and still blew...
|
|
|
|
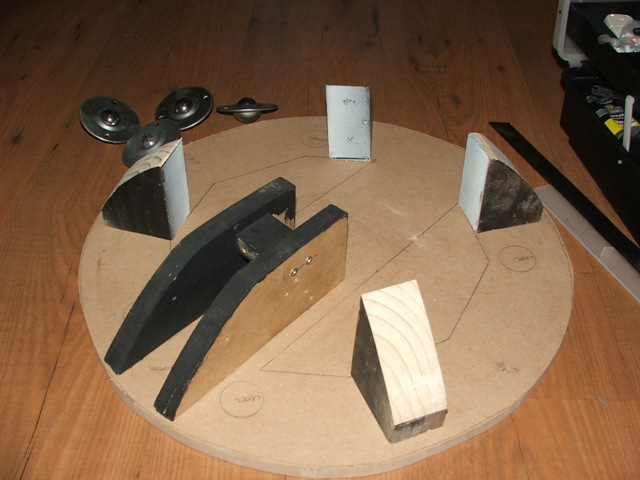
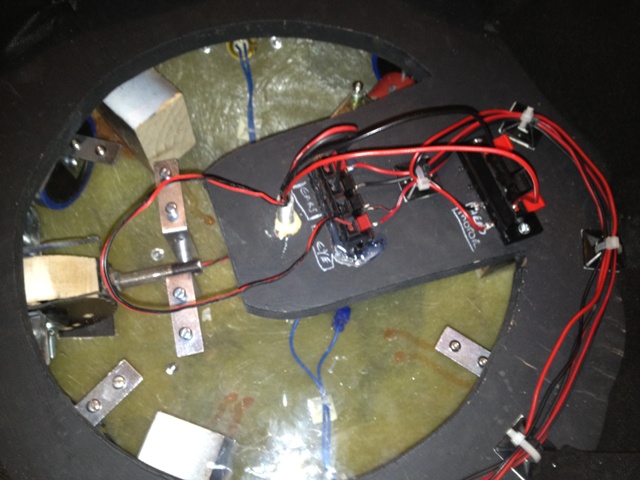
3rd May 2010 It's been almost 2 years since I updated this part of my website. Back when I began building the NSD I planned to make it radio control - whilst it's fun sometimes to get inside the Dalek, I much prefer to be outside and see it moving around. The RC transmitter & receiver I had bought are now in R2 D2, and building Artoo has given me the confidence and knowledge to complete the NSD in line with my original plans. I managed to pick up a 6 channel Futaba transmitter & receiver off eBay for a low price, and I had a dig through the spare parts to find the original dome motor, a fuse box, wiring etc - so apart from the speed controllers, I have everything I need to make the transformation. The first bit to tackle is the head - the innards of the head were a bit of a state - the disc that bolted to the dome was very thin and had cut outs in awkward places. To get started I cut a new disc, and after removing the eye-stalk mount and wheels from the original, I binned it - no pictures as it's too much of a mess to post a pic :) I cut the 20mm holes in the new disc to mount three of the bearings I use as wheels, a cut out for the bottom of the eye stalk pivot, and a cut out for the motor. The 'wheels' and motor were then bolted to the disc, and the pivot mount glued & screwed in place. The brackets that the disc fixes to the dome are now defunct, as the new dome won't have any cut outs - so I screwed three pieces of wood, shaped to the inside of the dome, to the disc and glued these to the inside of the dome with some P40 car filler. The disc can now be removed very easily for any maintenance. I have yet to decide whether to attach a servo to the eye stalk - or not, and how to counter weigh the eye stalk - and how to thread the wires down through the centre to the neck section - but more on that later on. |
.JPG)
.JPG)
.JPG)
.JPG) |
.JPG)
.JPG)
.JPG)
.JPG)