Dalek 2; 'Movie Style' Eye Stalk

19th April 2009

The eye stalk is finished, the eyeball & pivot are painted gloss black and the eye stalk discs are sanded smooth... I've glued the top of a Nivea deodorant tin into a plastic disc as an iris, which will be lit from behind with a cluster of red LEDs... only change to this may be the pivot being painted the same as the head like the original Movie Daleks...


28th March 2009

I've cut a length of hollow threaded rod to 18", and bolted this to the back of the eyeball. At the other end I've sanded the edges of the pivot and drilled a 8mm hole from front to back, and cut a recess in the front for the 25mm aluminium tubing to sit into. The threaded rod is slightly off centre so I can bolt the eye in the head through the pivot rather than one on each side to make it more secure.

I passed the tube over the threaded rod, and then added a 1.5" length of clear 30mm acrylic tubing over this, then a 2.5" eye disc. Using the plans I then cut 4x 0.75" sections of clear tubing which spaced out the 2.5", 3.5" and 4" eye discs.

I did cut a 1.5" section for behind the discs but I'm not sure how to fix it and maintain its transparency, so for the time being I've used a 5.5" section of 30mm acrylic rod which fits tight between the last disc and the pivot holding it all together.

Just needs paint now.


22nd March 2009

Small slow steps... the dog food tin is now fixed into the hemi with P40 car filler, and the hemi itself reinforced with a layer of P40 on the inside -  I've drilled a hole in the bottom to allow the threaded rod to bolt to the back. I've also filled around the opening to make the 'tapered' lip around the edge and sanded it smooth - ready for paint.

Using a scrap of 18mm MDF, and 2 bits of 6mm MDF I've cut out three 4" discs and sandwiched these together to make the pivot - its drying upstairs now and I'll do my best to leave it a few days to dry properly.

Pictures below were taken over a couple of days, first row showing reinforced plastic hemi with the dog food tin fixed in place, second row whilst the filler is drying, third row sanded smooth and the fourth row the eye pivot discs cut out and sandwiched together with lots of glue.


19th March 2009

It's begun... Dalek 2 is underway...

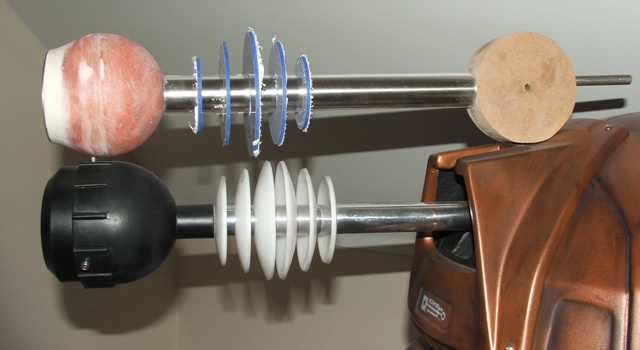
Using some 3mm blue perspex sheeting, and a Dremel hole cutter, I made 1x 4", 2x 3.5" & 2x 2.5" perspex discs for behind the eyeball.

I then cut .75" sections from some acrylic tubing for spacers to go between the discs, and a couple of 1.5" sections for each end of the eye disc section. This will then be glued together and slid over a 10.5" section of acrylic tubing so the eye stalk will be 1" in diameter for the end nearest the head, and 1.3" in diameter around the discs.

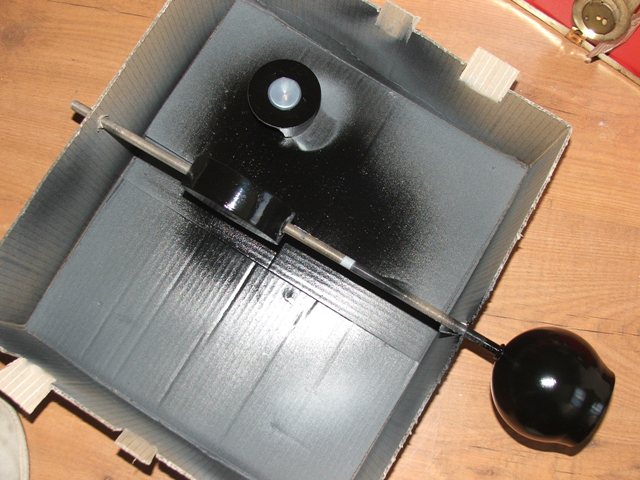
I've also cut a hole in a 4" hemi, along with a cut down dog food tin, which will be used to make a 'tapered' eye ball - the tin will be held in with some P40 filler that'll be used top strengthen the plastic ball inside, and also provide strength to a washer at the rear of the ball that the threaded rod will attach to.

Not much to see, but a start...