![]()
|
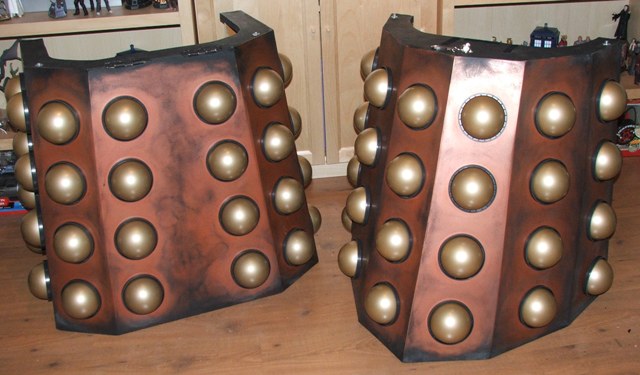
30th December 2008... 56 bright new golden hemis in a row... with 56 oil seals for them to sit in... I had to remove the old hemis from the skirt, trouble was I'd glued them in place for the last event and some didn't want to come off.. Once they were off, I had to clean up the weathering on the skirt as the new hemis are slightly smaller than the old ones and there were some very prominent circles which looked odd. The weathering was rubbed down with a scourer, and the new hemis bolted into place...#
|
|
|
|
29th & 30th December 2008... Got the hemis painted, Ford Olympic Gold over white primer, just need to dry so I can bolt them on...
|
|
|
|
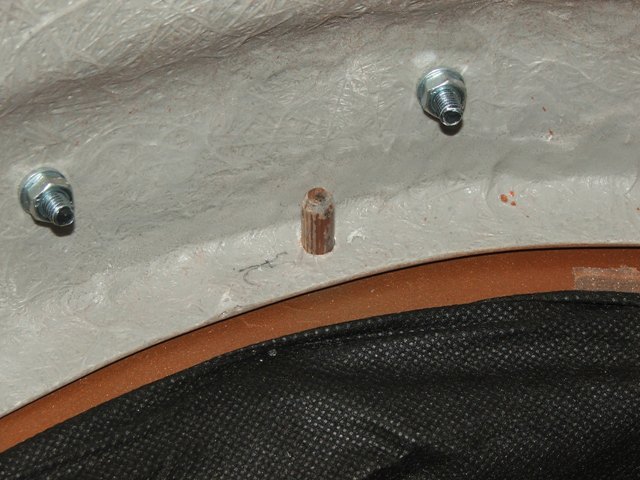
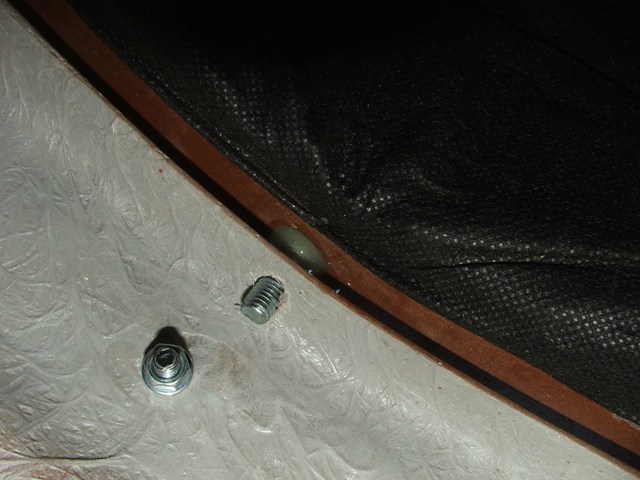
27th December 2008... Another quick update, I've added a blob of P40 car filler to each bolt head, firmly fixing them in place. I had tried using expanding foam filler to hold the bolts in place and add strength but after a trial on a couple of hemis it isn't strong enough to hold the bolts in place, one knock and they would have fallen off...
|
|
|
|
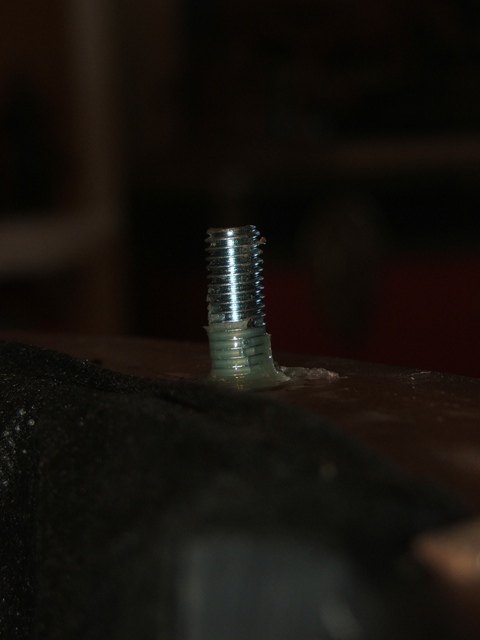
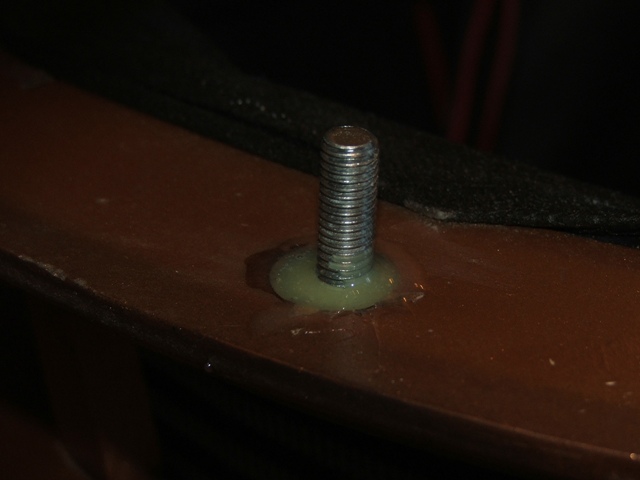
24th December 2008... Quick update, all hemis now sanded on the inside and the bolts are hot-glued into position ready for the filler...
|
|
|
|
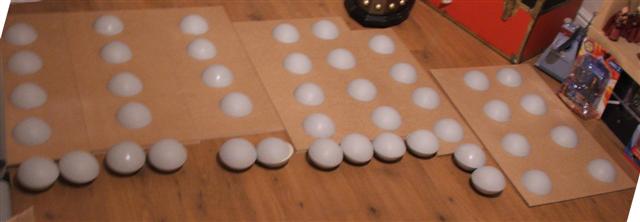
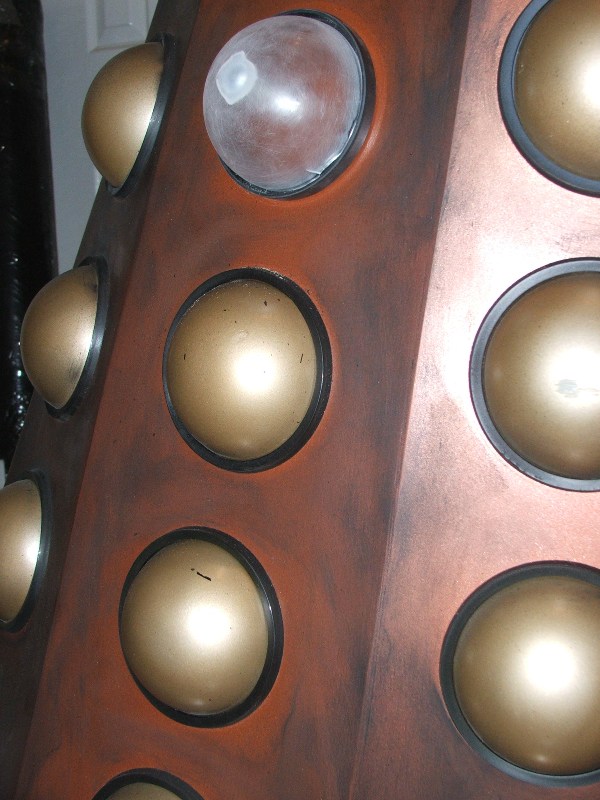
21st December 2008... Dalek is getting new hemispheres and 'screen correct' rubber oil seals to replace the soap container lids - the soup lids look great but the paint won't adhere properly and is flaking off. So the task of sanding 56 balls was undertook whilst watching a DVD. I started with 30 clear acrylic fillable ornaments, off eBay - they break into halves. Each half has a small tab that needs to be cut off with the Dremel, and once sanded I'll be hot-gluing 4" coach bolts to the inside of each, and reinforcing that with either a small amount of P40 car filler or expanding foam. I test fitted one on the skirt - the two halves are slightly different in that one has a ridge around the edge that fits into the other half. I'll need to remove this ridge as these halves sit to high on the oil seal - the 'outer' halves fit great. You can see the height difference in the first picture below. I plan to get the bolts stuck in before Christmas, and them painted & fitted by New Year...
|
|
|
|
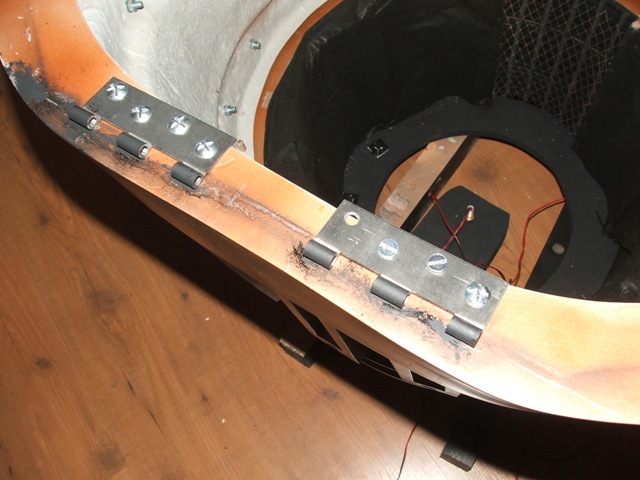
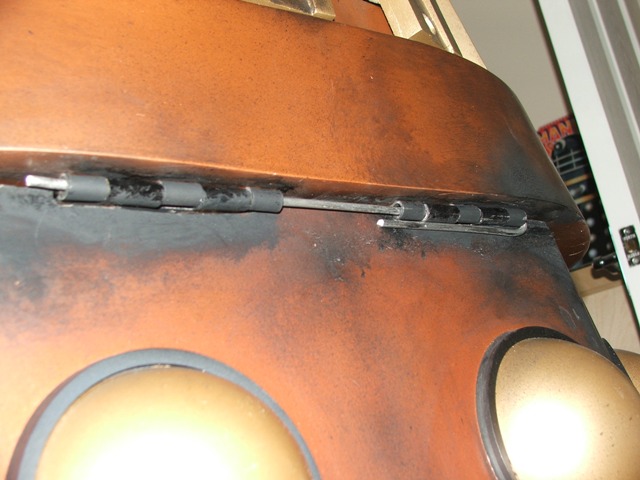
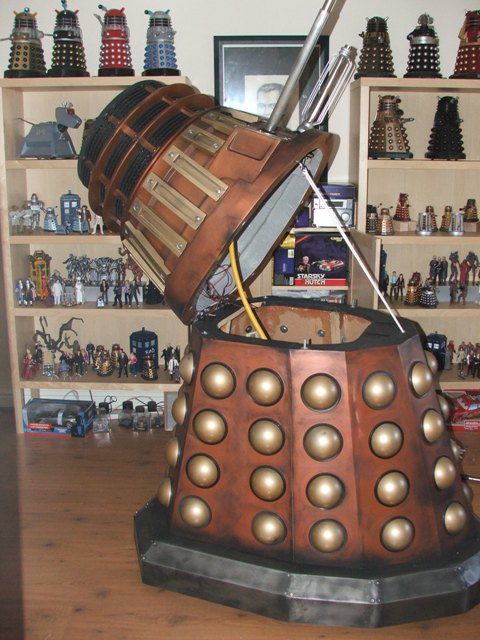
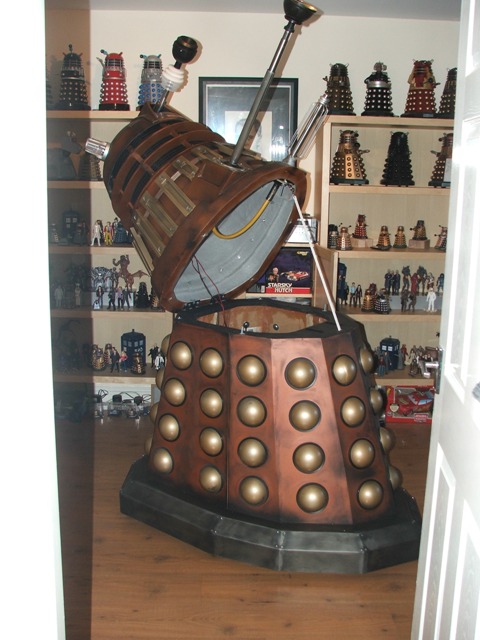
16th November 2008... Day 2 - I have used the spare hinge to help spread the weight on the fibreglass shoulders, so the bolts go through the actual hinge and then through a non-functional hinge-plate on the inside. The hinge-pin is a length of spare 'gun rod', or 5mm aluminium rod, pushed through and bent around the end so once it's all the way in it holds itself in position. A bit of matt black paint finishes it off blended into the weathering- so unless you get on your knees you can see the [slight] gap or the hinges. Next job was to make the neck secure on the shoulders so it doesn't fall off - it's currently held on by 4 sections of 8mm dowel, glued into the bottom neck ring and married to 8mm holes in the shoulder section. I removed the two at the front and enlarged the holes, made up some quick setting Araldite and glued in some 1" M8 bolts that I can bolt in from inside. I can just about clamber in and out [got stuck at one point] but I am worried that the head will fall off... I may have to re-do the threaded rod that the head rotates on - the wires for the eye and lights run through the threaded rod but there is no way to bolt the head to stop it falling off. I need to rethink how the head sits on the neck and how the wires run from the head to the base but I'll save that job for next weekend...
|
|
|
|
15th November 2008... Getting in and out of Dalek is a two or three man job, certainly not something you can do alone so, with a pair of hinges at the rear of the skirt which allows the shoulders to hinge up to the rear so I can [possibly] clamber in and out on my own. I still need to add a strap to stop the shoulders opening too far, and secure the neck to the shoulders as well, maybe tomorrow...
|
|
|
|
2nd March 2008... Now its all bolted together thought I'd bolt on the hemis - just to see what it looks like... first the soup lids - oops, surrounds... |
|
|
| Then screwed the hemis on... |
|
|
| Now he looks like a Dalek...! |
|
|
|
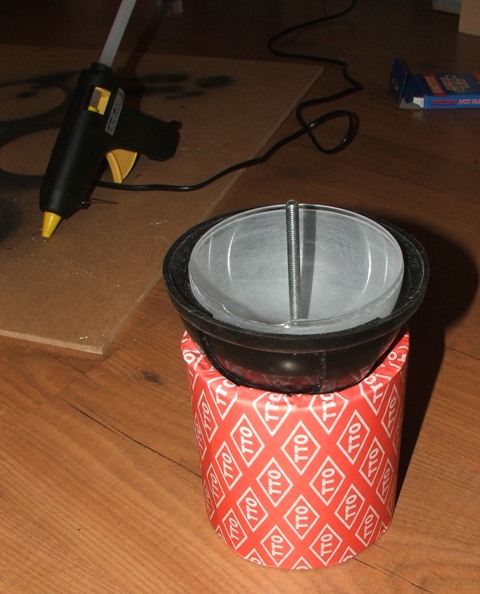
16`/17th February 2008... I've been looking for some surrounds for the skirt hemis for a while, and happenned to notice that the local Chinese Takeaway delivers soup in containers with a lid with a raised edge that the hemis fit into perfectly... Not screen accurate but pretty good... and the takeaway happily supplied me with 60 lids... Each hemi is filled with expanding foam, which now has a rawplug glued in with Araldite resin adhesive. The hemi sits in the lid, and as the size is perfect is held there on its own, and then they will be screwed to the skirt from behind. I've fitted one as a test, with a lid that has been painted black on the inner surface - looks OK to me...!
|
|
|
|
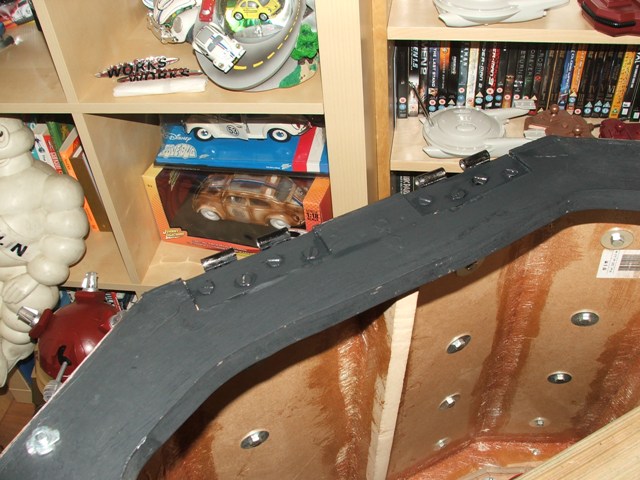
3rd February 2008... Primed and ready for a final sand and paint...!
|
|
|
|
2nd February 2008... I have now sanded the corners of the skirt ready for some filler, looking better now...
|
|
|
|
23rd January 2008... Spent the evening fibre-glassing the inside of the skirt... got that twist looking just right...! Next step, filling and sanding... |
|
|
|
20th January 2008... Feeling just a little bit proud of myself today - the skirt is built, although still very unfinished... Having tried to get the frame through a doorway, it became quickly apparent that I would be needing a spilt skirt if the Dalek is to get out of the spare room...! This morning I made up the struts to allow the frame to split, and then bravely cut the base and lid in half... then put it all back together again and it worked...!
|
||
|
Next step was to add the panels...
...and then stand back and admire... |
||
|
|
|
.JPG) |
|
HoW BiG..!! |
||
|
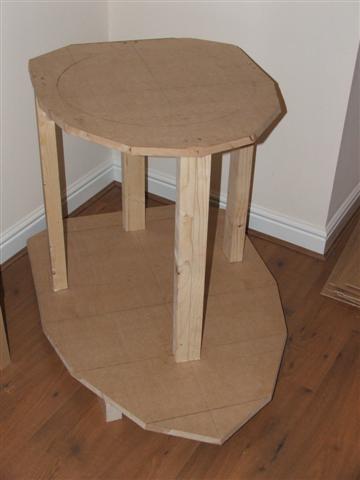
13th January 2008... I braved my new circular saw today and cut out the skirt lid and base - yes - straight lines! I then shortened the struts so that it all sits at the 'correct' 68.4cm and screwed it all together... Looks a bit weird but coming together... |
 |
|
10th January 2008... I spent this evening marking out all the panels, each panel now has marks in the right places for the hemis, and the skirt base & top are marked out ready for cutting - here's hoping I can cut a straight line...! |
.JPG) |
 |
|
9th January 2008... my motivation returns...! NOw I've got hold of a decent shoulder section, I thought to motivate me even more I'd start work on the skirt, so off I trundled to B&Q, filled a trolley up with lots of 6mm and 18mm MDF, and pulled up at the wood cutting desk... "how many cuts...?" I now have 13 skirt panels as per the 'Project Dalek' plans, all marked up for cutting to the right shapes, and just to keep me smiling, I roughly placed the 'hemis' on the panels...! To motivate me even further I put what I have together... the 18mm MDF base, the struts to hold it up, the 18mm MDF skirt 'lid', the 'dodgy' shoulders and the head and neck section...
|
|
.JPG)
.JPG)
.JPG)
.JPG)
.JPG)
.JPG)
.JPG)

.JPG)
.JPG)
.JPG)
.JPG)
.JPG)
.JPG)
.JPG)
.JPG)
.JPG)
.JPG)
.JPG)
.JPG)


.JPG)
.JPG)
.JPG)
.JPG)
.JPG)
.JPG)
.JPG)
.JPG)
.JPG)
.JPG)
.JPG)
.JPG)
.JPG)
.JPG)
.JPG)
.JPG)
.JPG)
.JPG)
.JPG)
.JPG)
3.JPG)
4.JPG)
1.JPG)
7.JPG)
2.JPG)
.JPG)
.JPG)
.JPG)
.JPG)
.JPG)
.JPG)
.JPG)
.JPG)
.JPG)
.JPG)
.JPG)
.JPG)
.JPG)
.JPG)
.JPG)
.JPG)
.JPG)
.JPG)
.JPG)
.JPG)
.JPG)
.JPG)